
Last week, I made a curtain for the window and then this week I decided I didn't like it. It just wasn't right but I couldn't figure out exactly what I didn't like about it. My mom suggested using burlap since we made a fun coffee bar and used burlap with it ( I will post pics of the coffee bar later). I searched Pinterest this morning for ideas and found about 200! It was one of those moments where I couldn't find the bottom of the Pinterest page. Before I knew it, I had been looking at burlap curtains for over 30 minutes. Overall, I decided it looked easy and inexpensive. So I loaded up the three kiddos and headed to Hobby Lobby. I found a great burlap with black fleur de leis accents. I used the 40% off coupon which made the two yards a little over $7.00. I also picked up a roll of Stitch Witchery to make sure sewing would not be needed. By the way, two yards was more than enough. I can use the extra burlap for projects, gifts, crafts etc.
DIY No Sew Burlap Curtains
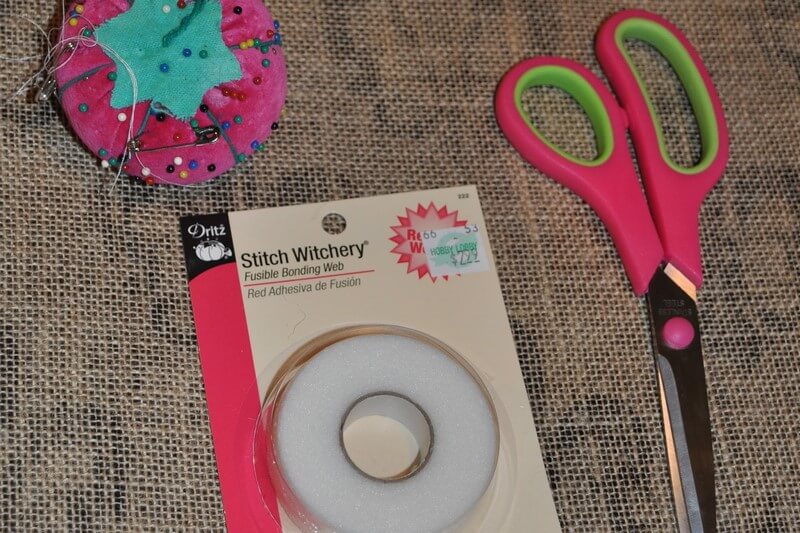
Step 1: Gather supplies (burlap, straight pins, scissors, Stitch Witchery)
Step 2: Lay fabric out over a large surface. Measure fabric and determine if you want one or two panels. I decided to go with two panels so I can open the curtains from the center. I did not make the panels full because I did not want the gathered look at the top. I wanted it to fit the window almost exact.
Step 3: If you are using two panels, measure and cut down the center. Then decide how big you want the fold at the top (where you will put the rod).

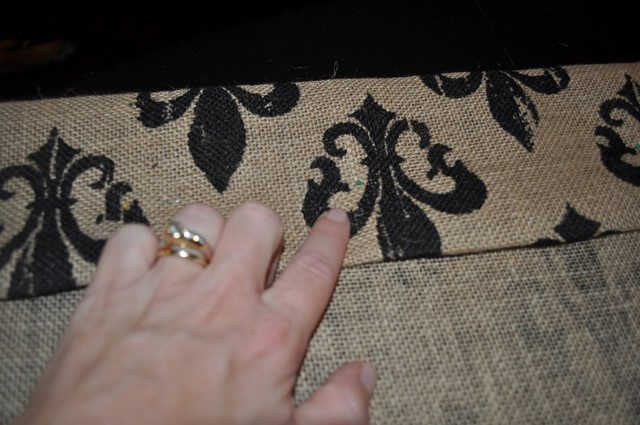
Step 4: After making your large fold, also fold under the bottom edge. Secure everything with straight pins. The tiny green dot above my finger shows the straight pin. I pinned every few inches.
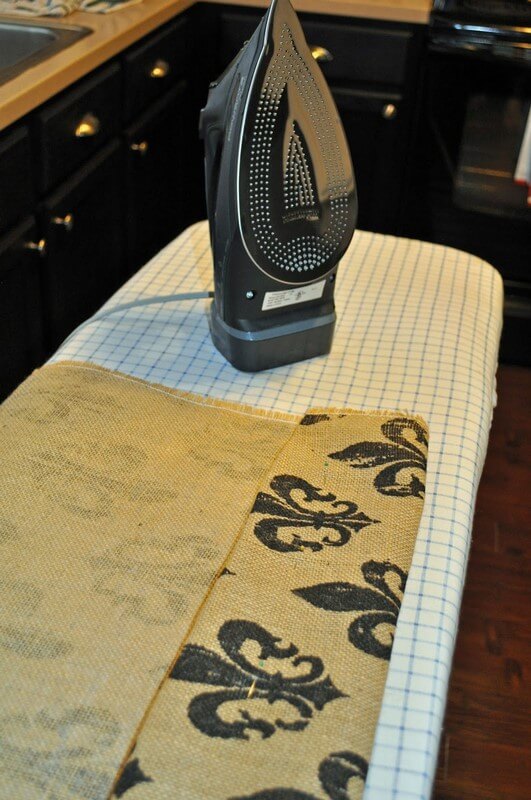
Step 5: Run the Stitch Witchery under the bottom of the fold (you should not be able to see it). This is where you want the fabric to adhere to itself, making a hem.
Step 6: Fill your iron with water and place on the "wool" setting. Press the iron over the fabric and Stitch Witchery. Do not slide the iron across the fabric, only press and release. I also folded the bottom of the curtain to create a bottom hem and used Stitch Witchery to adhere it. This made a nice finish on the top and bottom of the curtain.
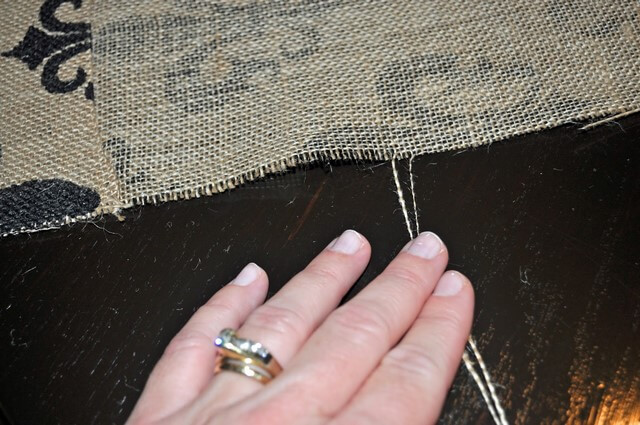
Step 7: Pull a couple of rows of string out of the burlap. This will keep the unfinished edges from fraying. You could run a hem around all four edges if you wanted to. I decided to go this route, it was faster and I like the look of it.
Step 8: Using a tension rod, hang the curtain in the desired position.
(please don't judge the water spots in my sink :) )
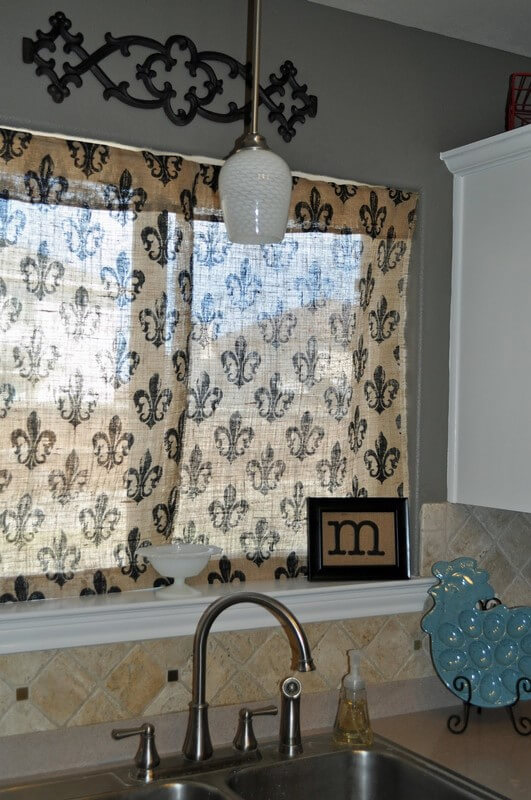
I love how the large weave of the burlap allows a lot of light to come through but there is still some privacy. It took about 30 minutes and less than $10, I call that a success!
Elizabeth
No comments:
Post a Comment